Introduction
Nutanix CE allows you to install Single-Node, Three-Node, and finally Four Node clusters. Depend up on your hardware. Nutanix best practice guide recommends a Three-node Cluster features most relevant.
Nutanix CE is a free version of Nutanix AOS (Acropolis Operating System) powers the Nutanix Enterprise Cloud Platform.
The Nutanix CE of AOS Software is designed for people interested in testing its main features on their own hardware and infrastructure.
The Nutanix CE of AOS Software not a commercial product. Nutanix commercial solution is also available on Supermicro, Dell, Lenovo, Cisco and HPE etc.. hardwares.
What’s In Community Edition:-
1. Hypervisor (Acropolis hypervisor). 2. Single pane of glass control API (Prism web console). 3. Nutanix command line – nCLI. 4. Capability to add nodes to the cluster (One, Three, & Four nodes). 5. Simple Installation and Test (Booting the AHV Hypervisor & AOS Software’s from Single USB Flash device). 6. AHV Hypervisor join with a DSF. 7. Advanced configuration & management with command line access.
Some of the Awesome Features Available With CE:-
Deduplication, Compression, Erasure Coding, Asynchronous DR,
Cloning, Single Node (RF-1), Three Nodes (RF-2) or Four Nodes (RF-2), Acropolis Hypervisor (AHV) (All VM operations, HA etc….).
Analytics, Full REST API for develop, Orchestration & Automation, Self Healing, ToR Integration, Metro Availability (MA), Synchronous Replication & Cloud Connect is not part of Nutanix CE.
General Requirement:–
Cluster needed Internet connectivity (Traffic on TCP-80 & TCP -8443) to sent data and usage statistic to Nutanix through “Pulse & Alerts”.
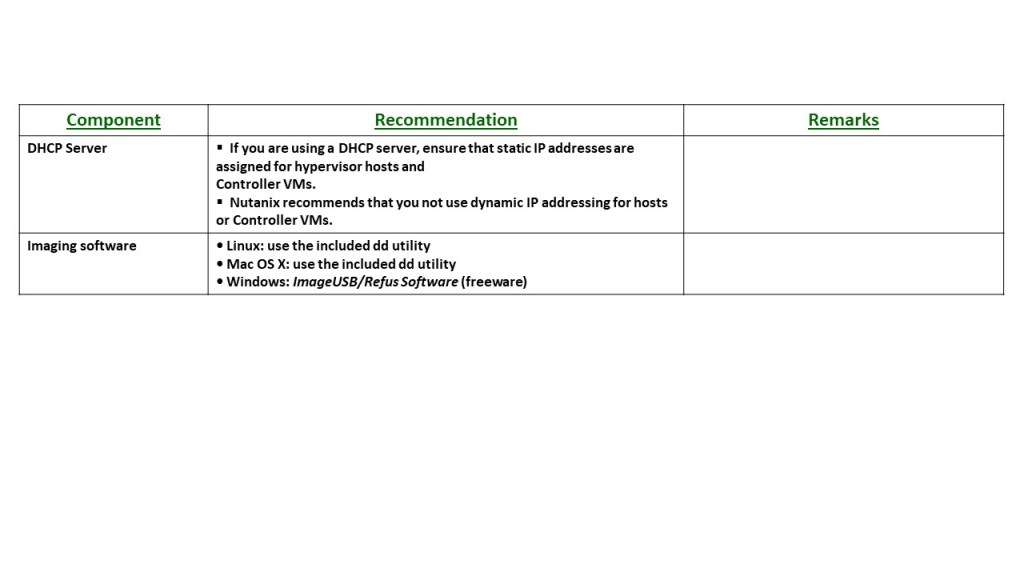
Static IP addresses for the CVM (Controller Virtual Machine) & and different IP address for Host.
Don’t use the IP- 192.168.5.0/24 subnet, it’s reserved for Nutanix internal usage.
Use higher quality USB 3.0/3.1 Flash Drives.
Enough physical memory and cores (Minimum 16GB and 4 cores).
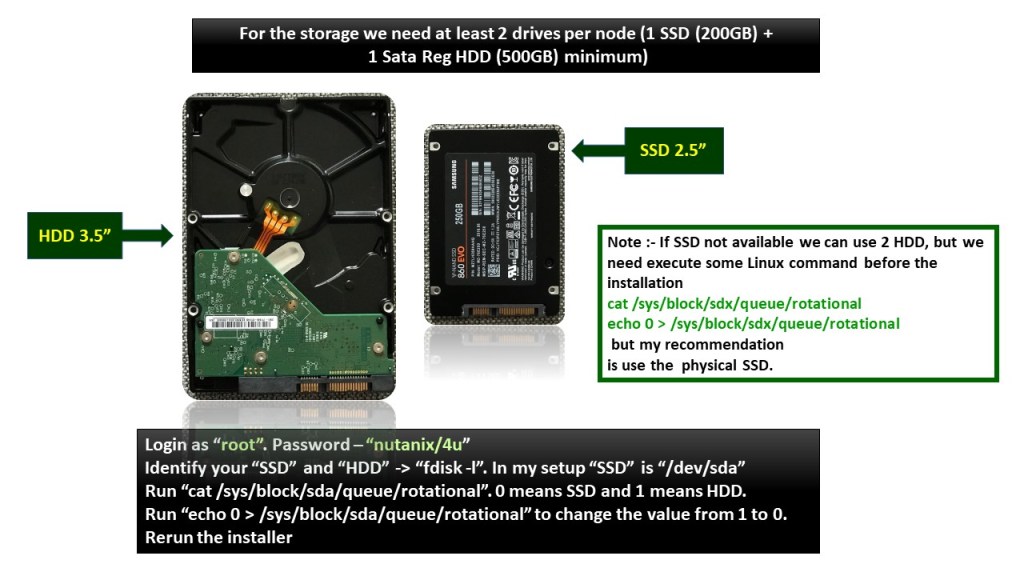
Minimum 1x SSD (200 Gbe) and 1xHDD (500 Gbe).
Minimum 1 Gbe supported Lancard and switch (Intel NIC recommended).
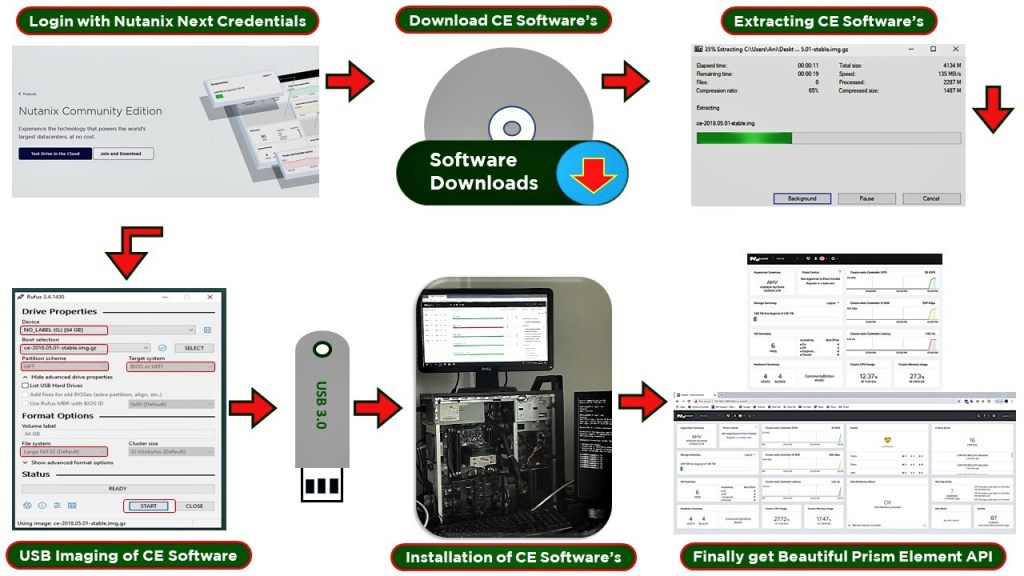
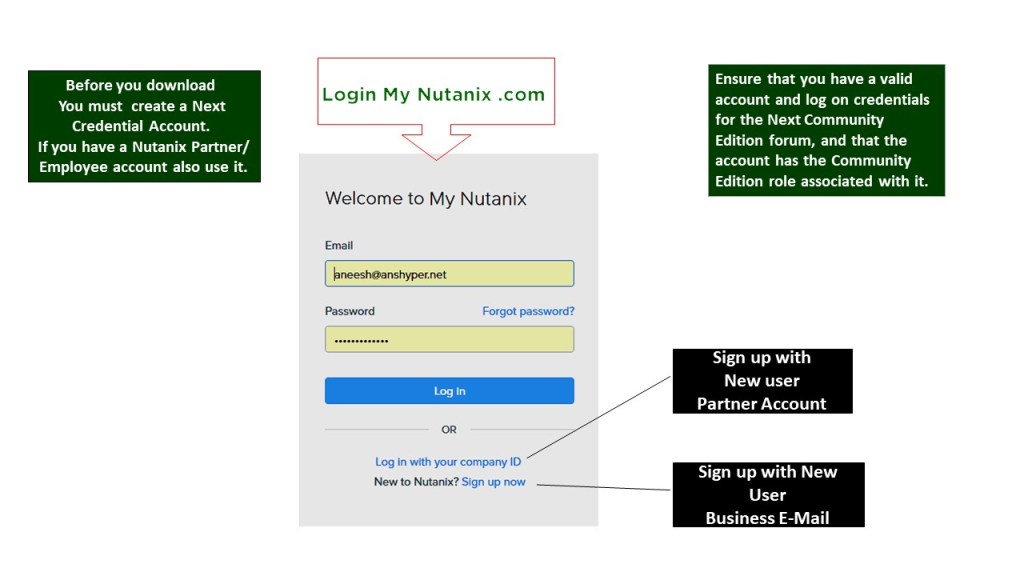
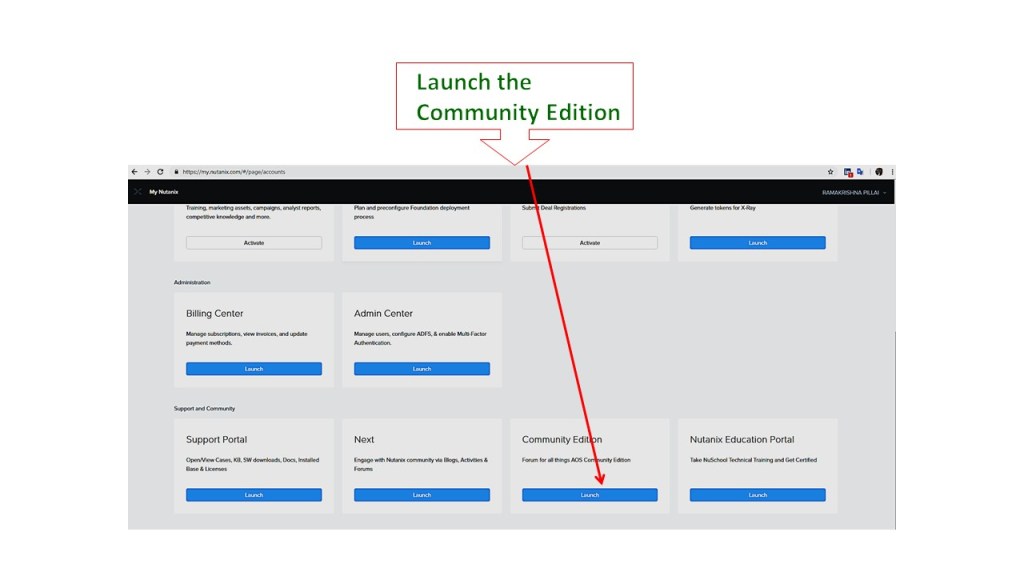
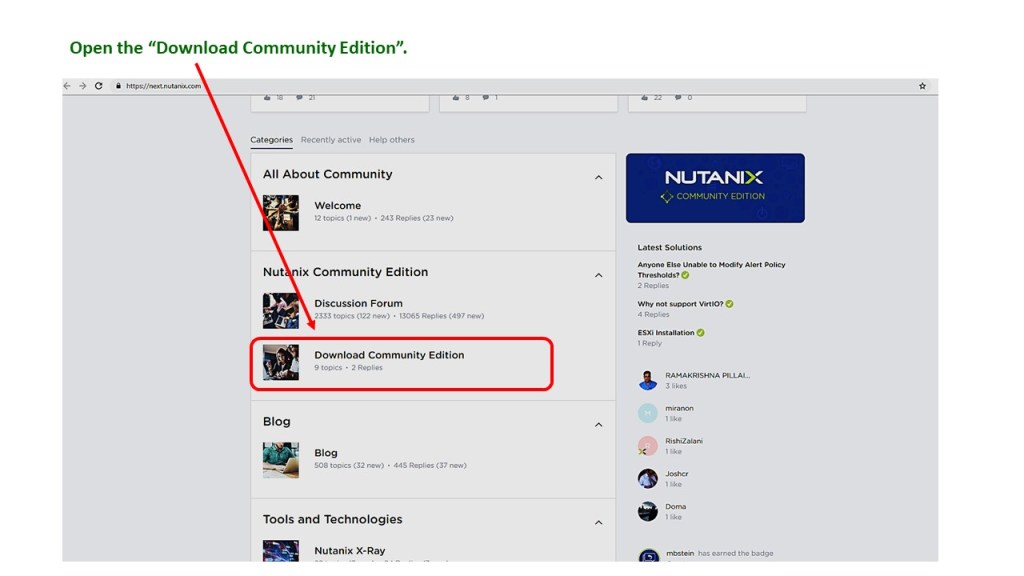
Join & Download the “Community Edition” Software:-
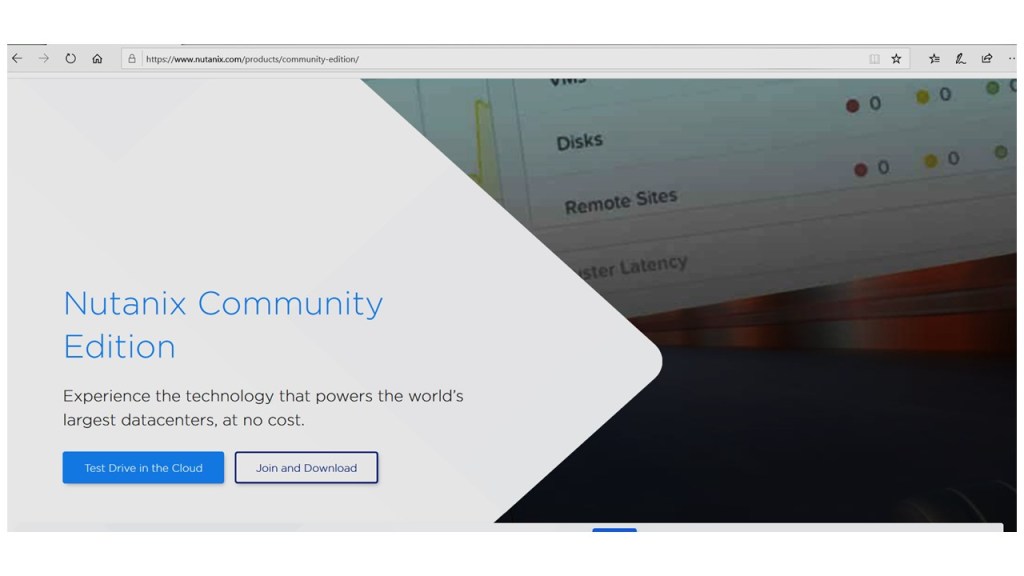
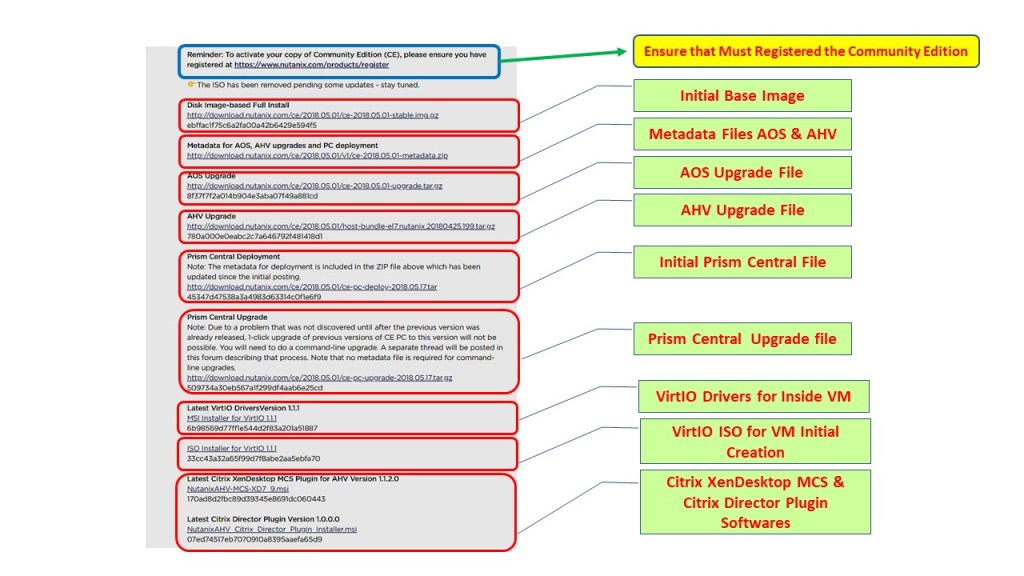
Register the Community Edition:-

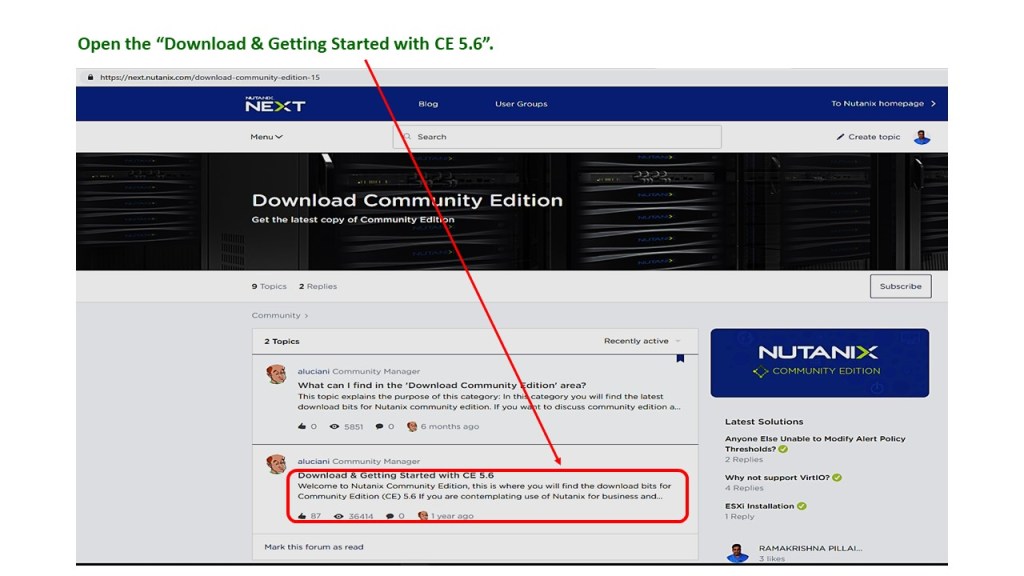
CE Software Downloading Procedure :-
CE Software Downloading Procedure (Contd…):-
CE Software Downloading Procedure (Contd…):-
CE Software Downloading Procedure (Contd…):-
CE Software Details:-
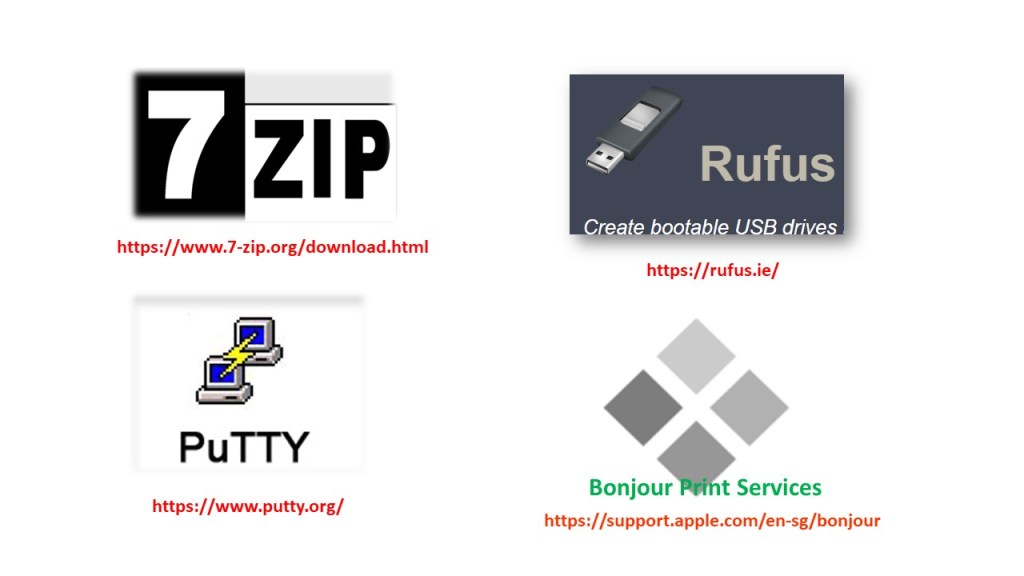
Additional Required Third Party Sofwares:-
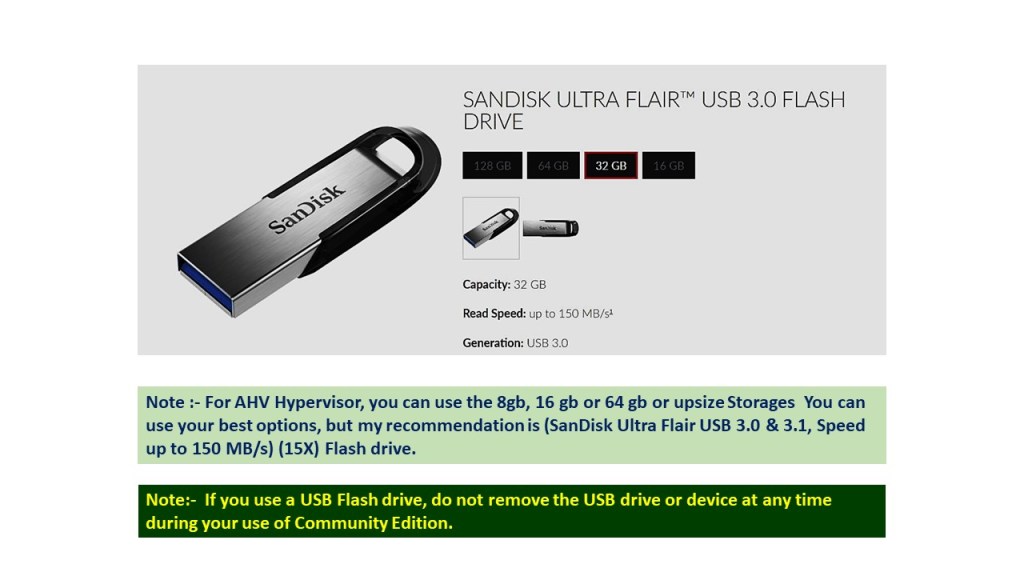
Recommended AHV Satadom Flash Drive:-
CE Minimum Required Storages:-
Recommended Community Edition Hardware for Nutanix Node:–
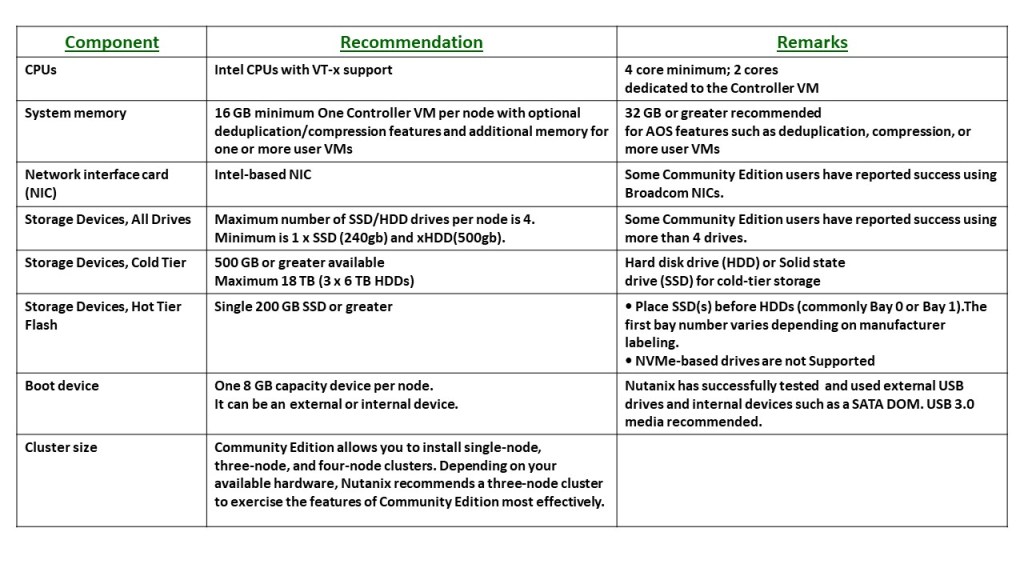
Recommended Community Edition Hardware for Nutanix Node (Contd..)
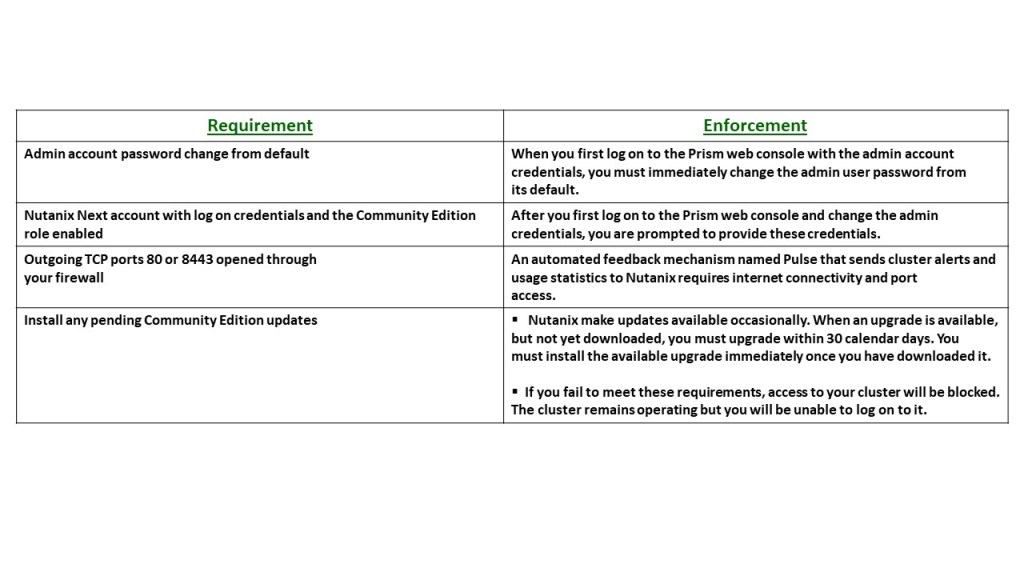
Nutanix Community Edition Licensing Requirements:-
Recommended Hardware for Nutanix Node:-

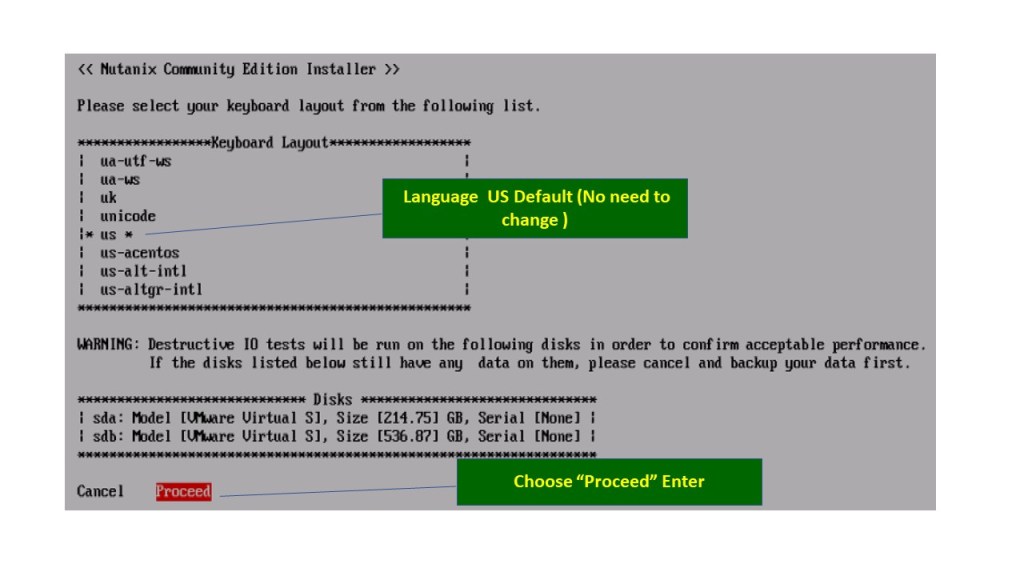
Installation Step- 1 :-

Installation Step-1 (Image Extraction ) :-

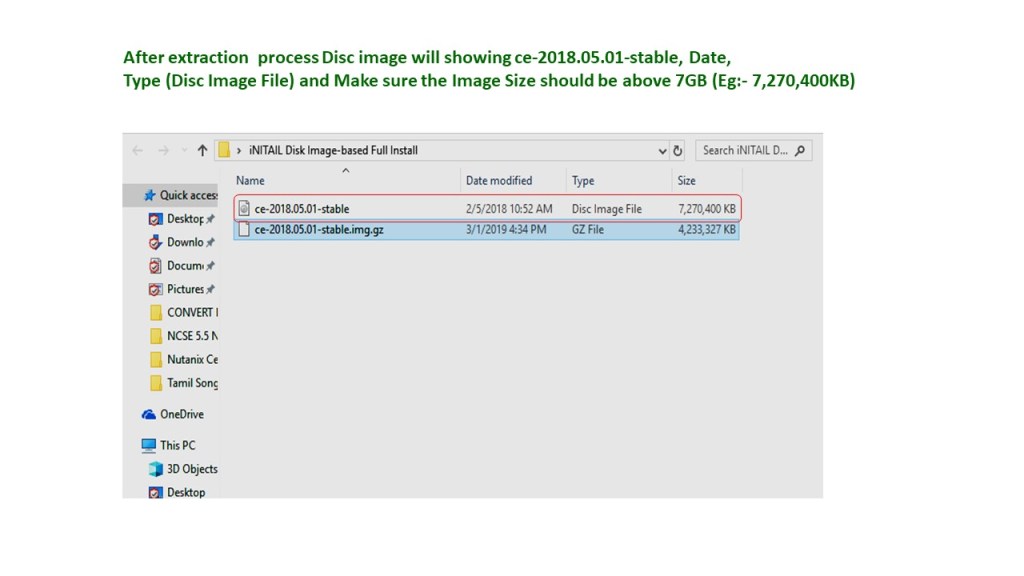
Installation Step-1 (After Extraction) :-
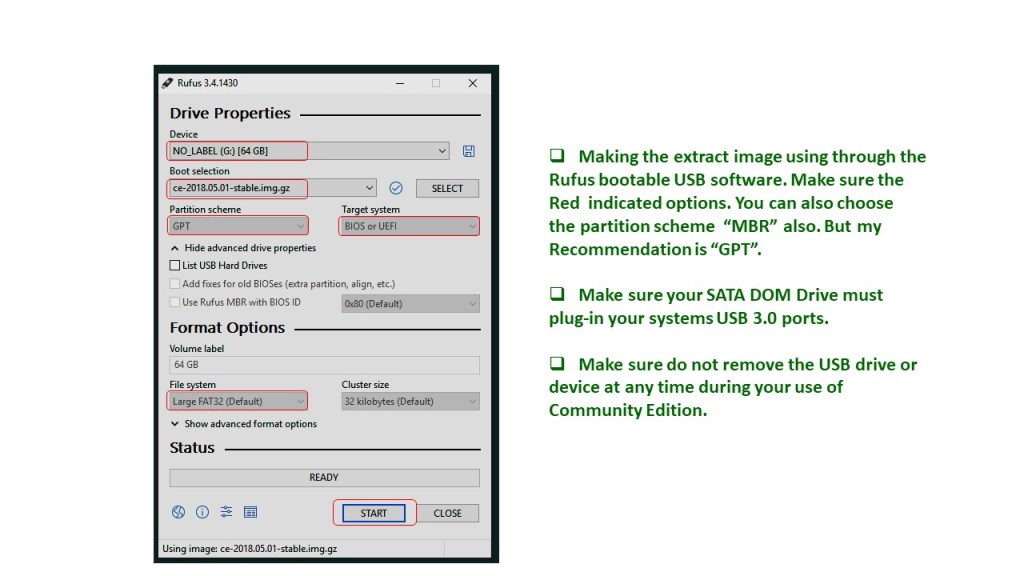
Installation Step-2 (SATADOM Creation) :-
Installation Step-3 (After Flash Drive Creation):-

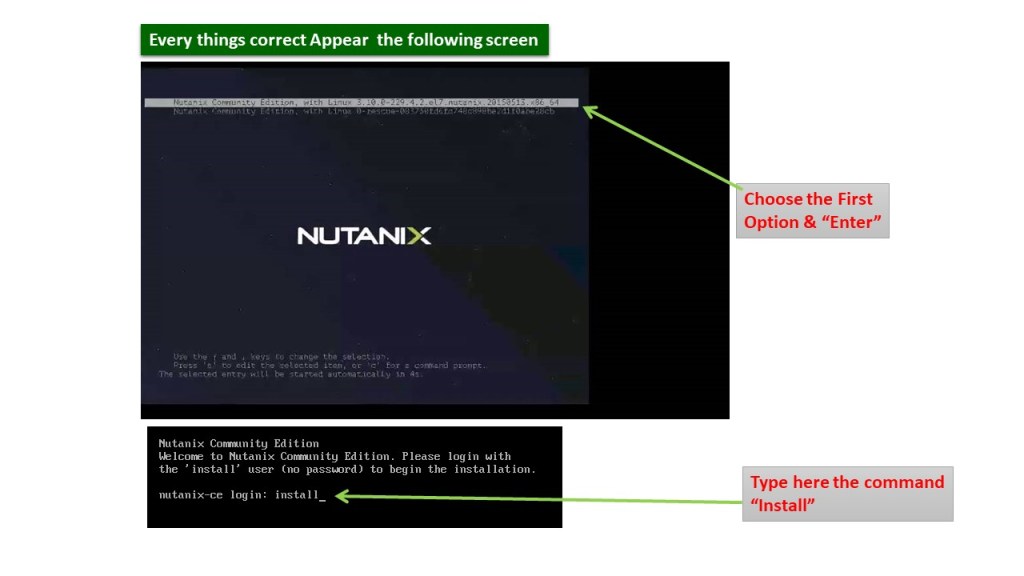
Installation Step-4 (AOS Boot Options):-
Installation Step-5:-
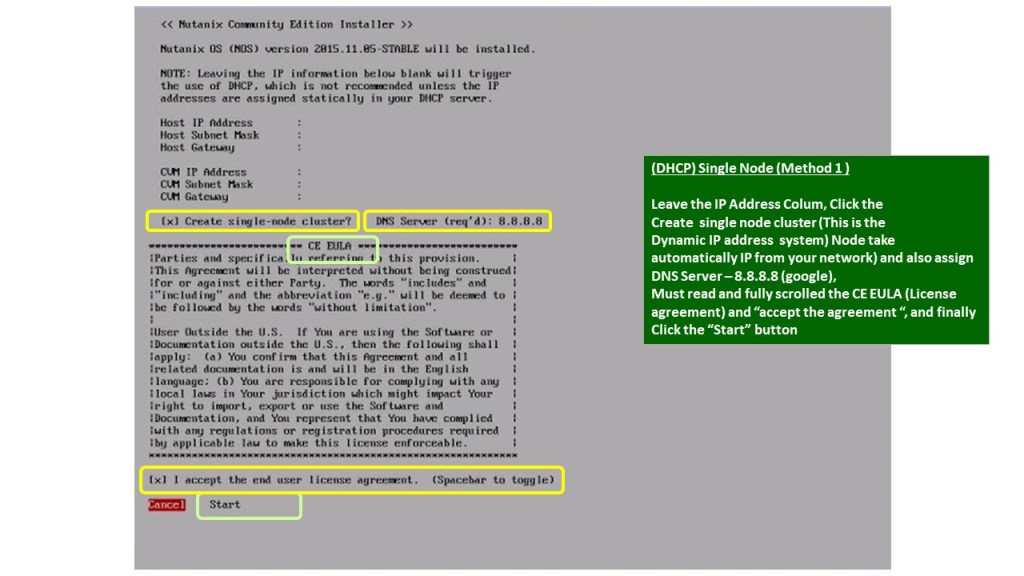
Installation Step-6 (Single Node DHCP Option):-
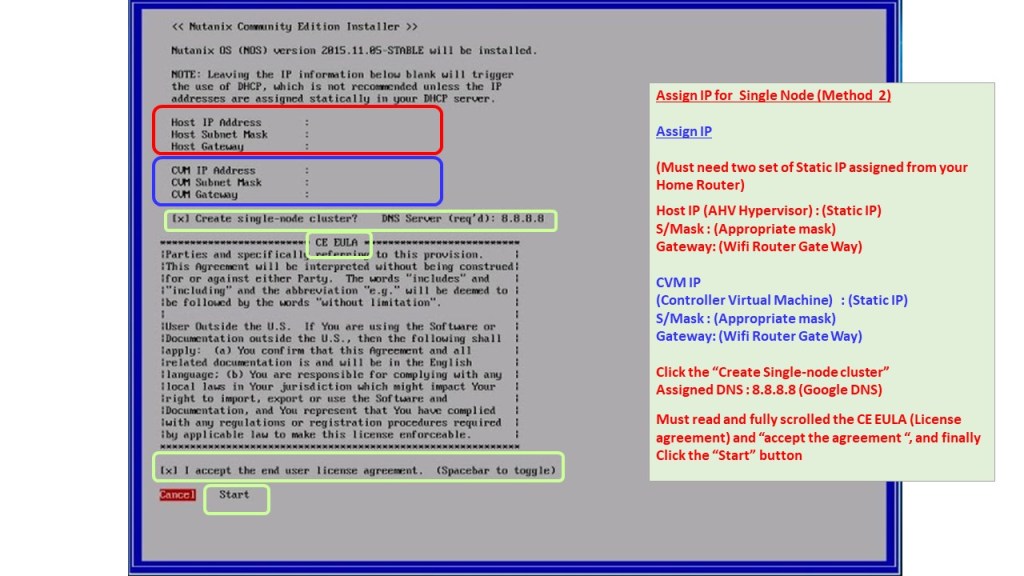
Installation Step-6 (Single Node Static IP Option):-
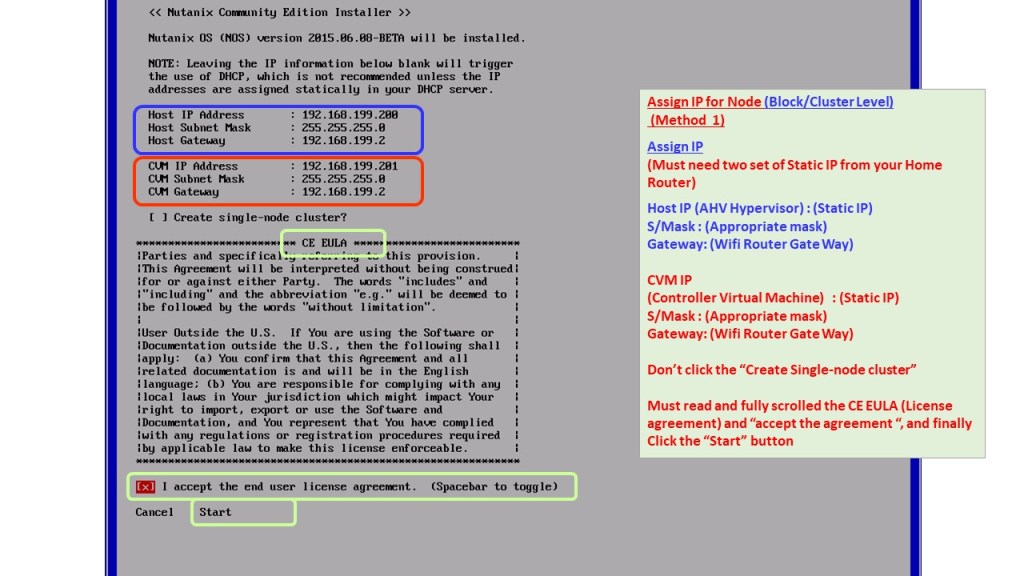
Installation Step-6 (Multi Node Static IP Option):-
Installation Step-7 (Executing Storage Performance Test & Installation):-
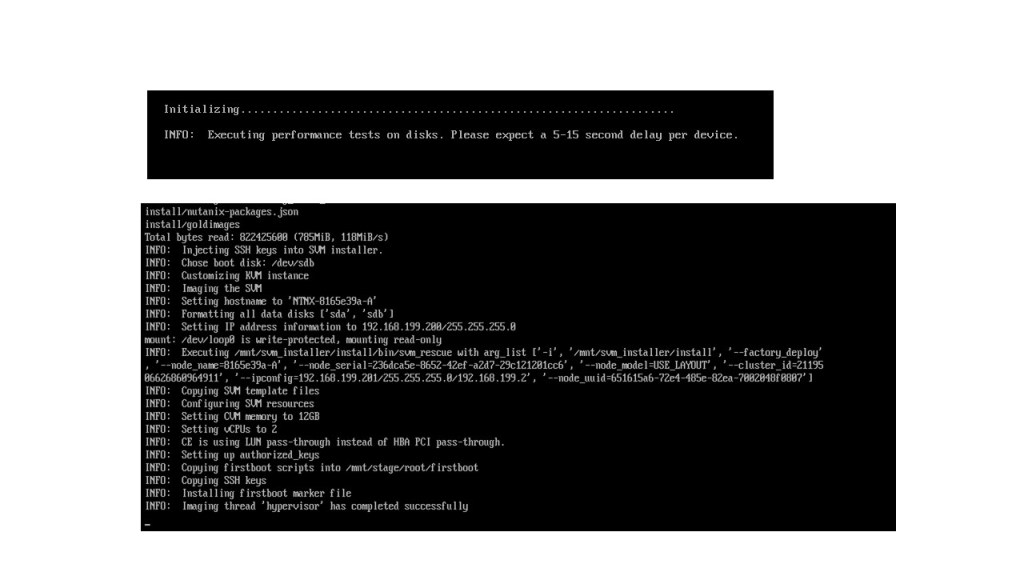
Installation Step-7 (Executing Storage Performance test & Installation Continuous):-
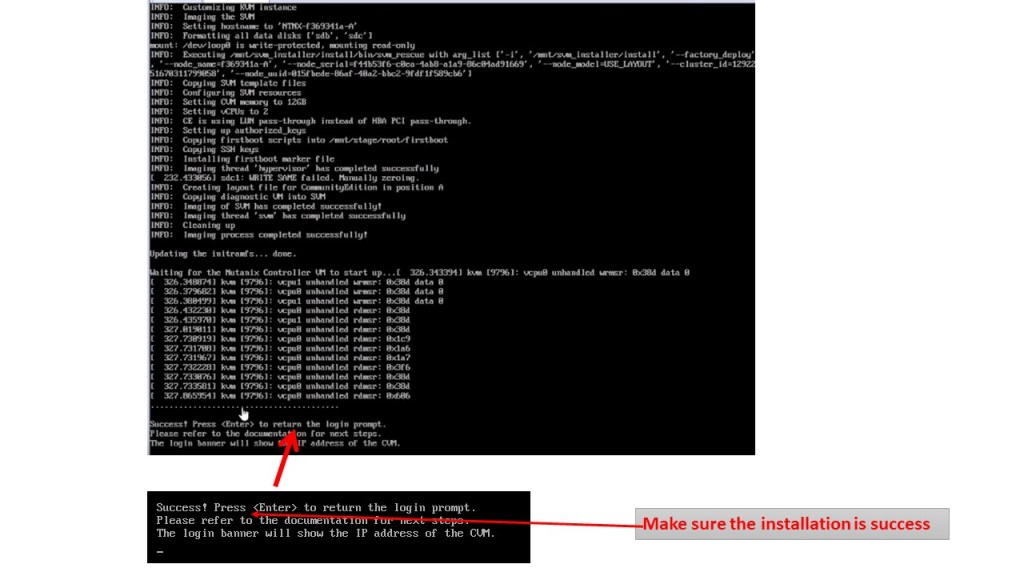
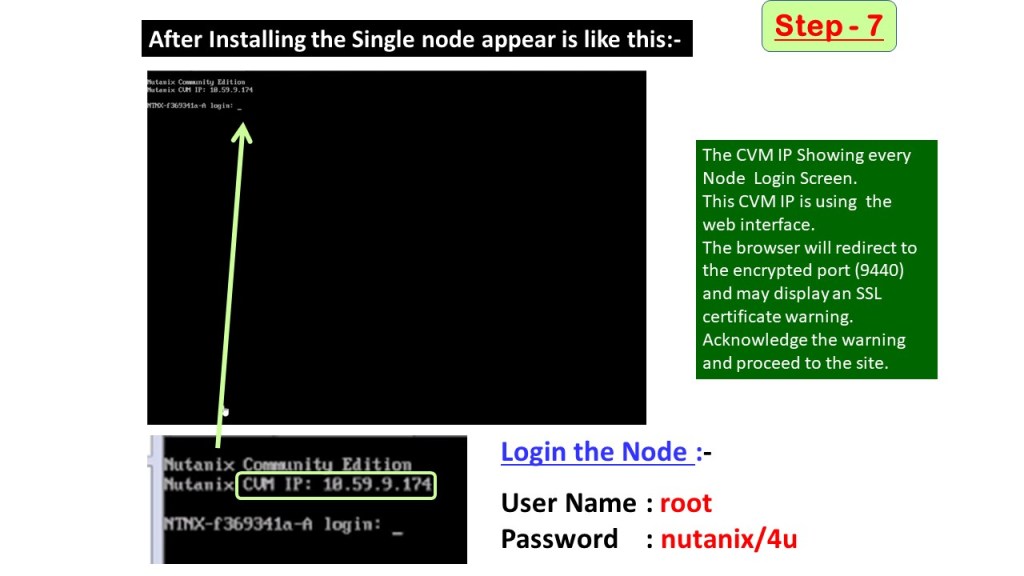
Installation Step-7 (Login the Node CVM):-
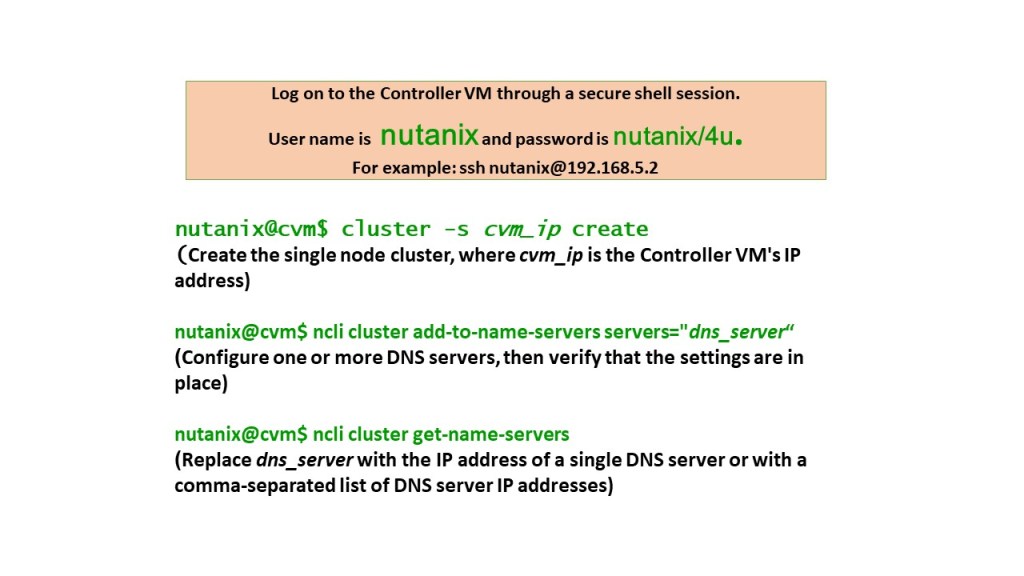
Installation Step-8 (Creating Single Node Through SSH):-
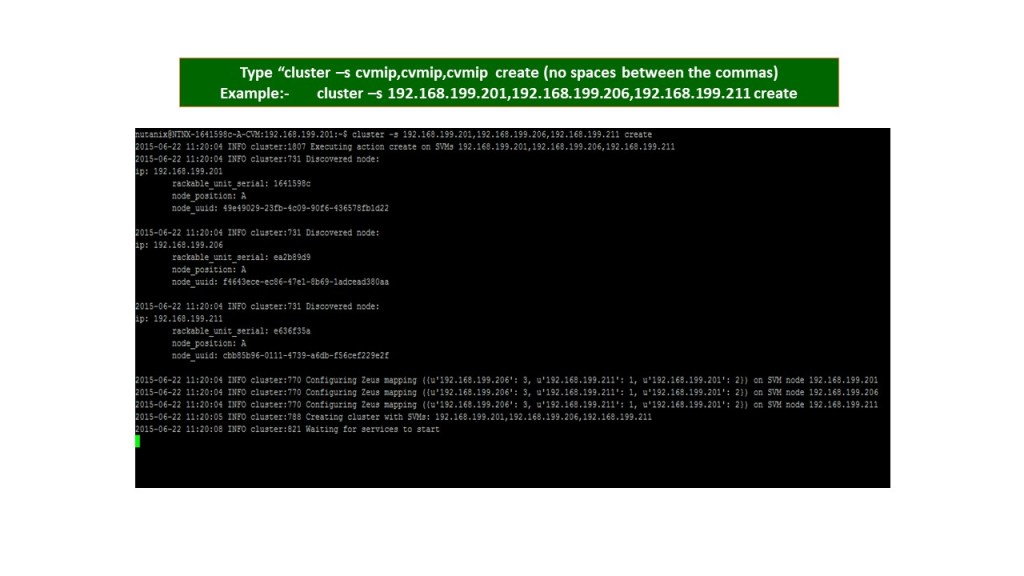
Installation Step-8 (Cluster Creation Manual Method SSH) :-
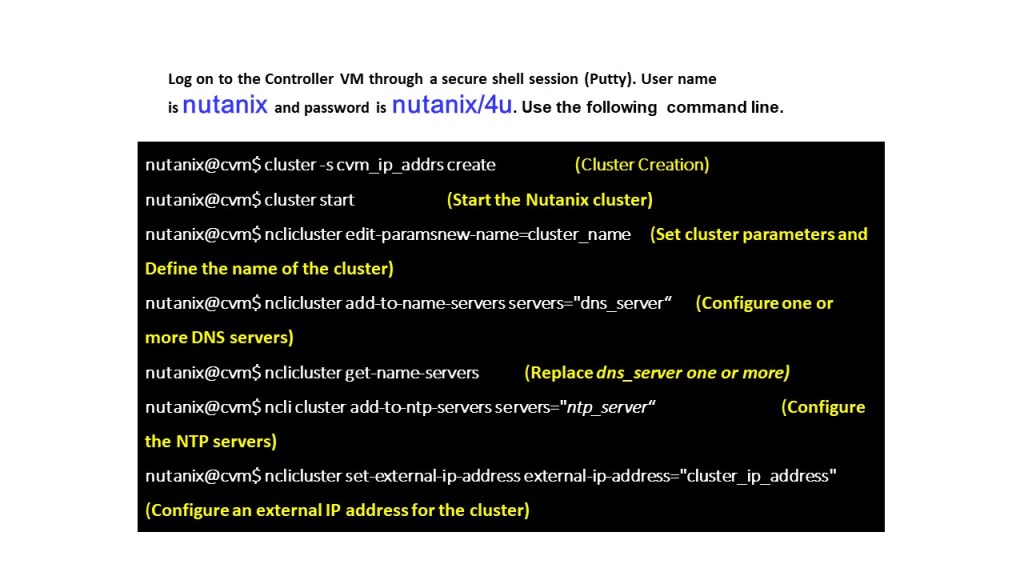
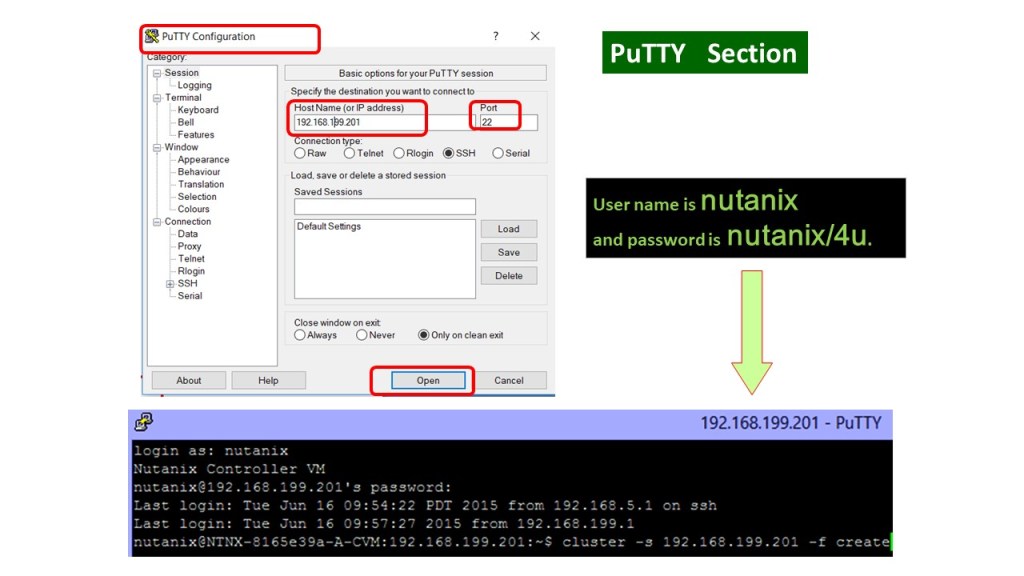
Installation Step-8 (Cluster Creation Manual Method PuTTY SSH):-
Installation Step-8 (Cluster Creation Manual Method PuTTY SSH) Contd..
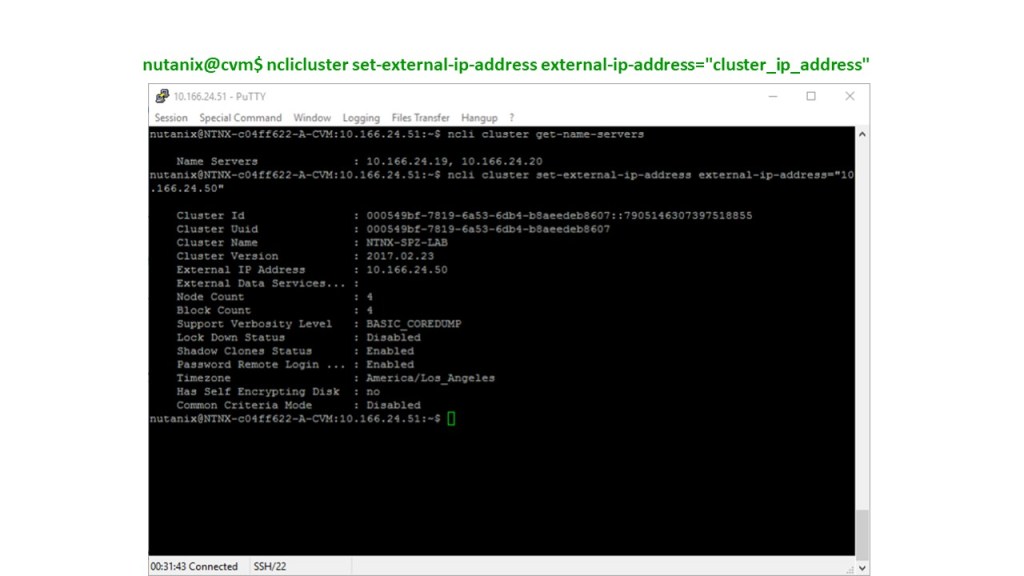
Installation Step-9 (Configure an External IP Address for the Cluster):-
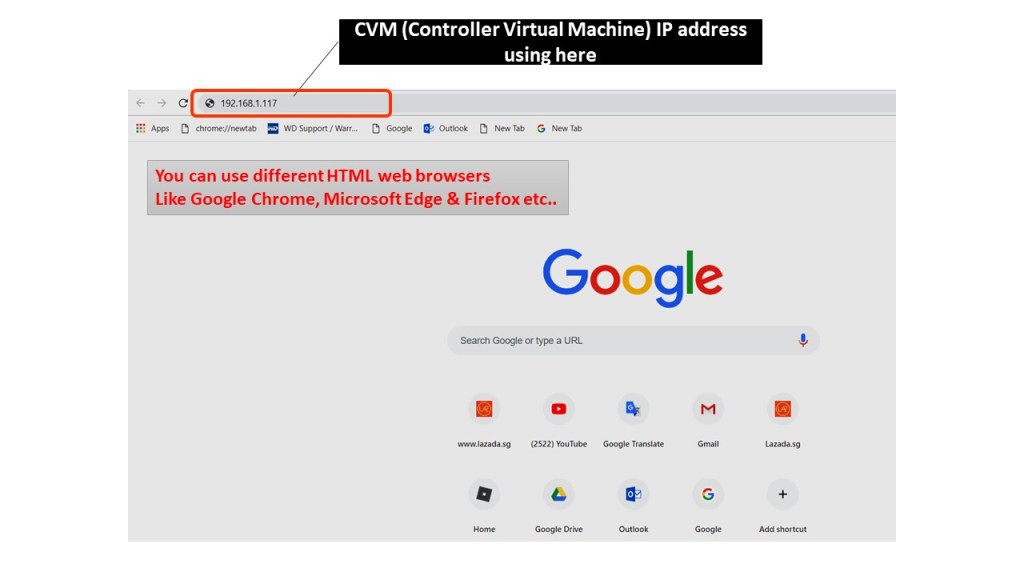
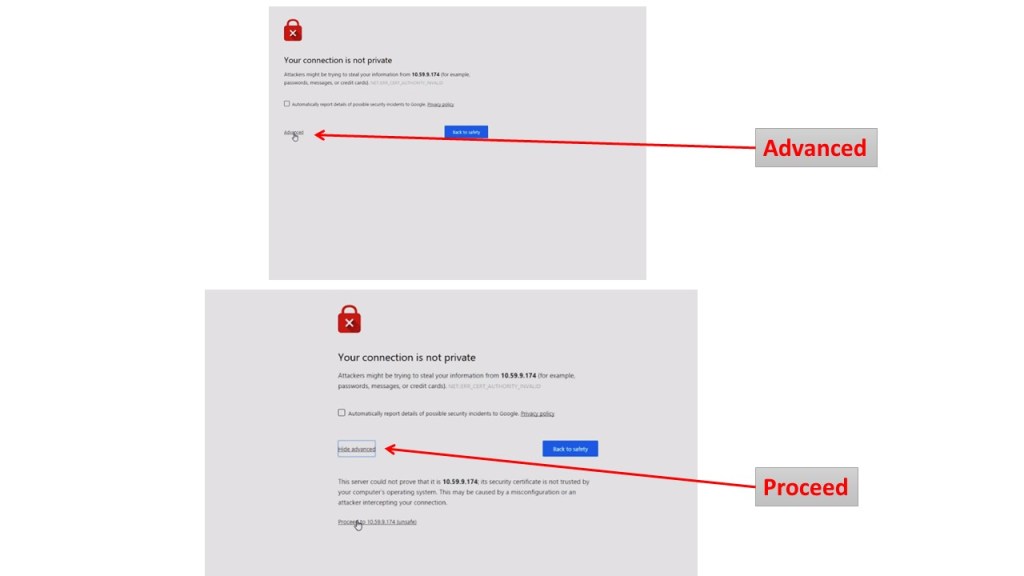
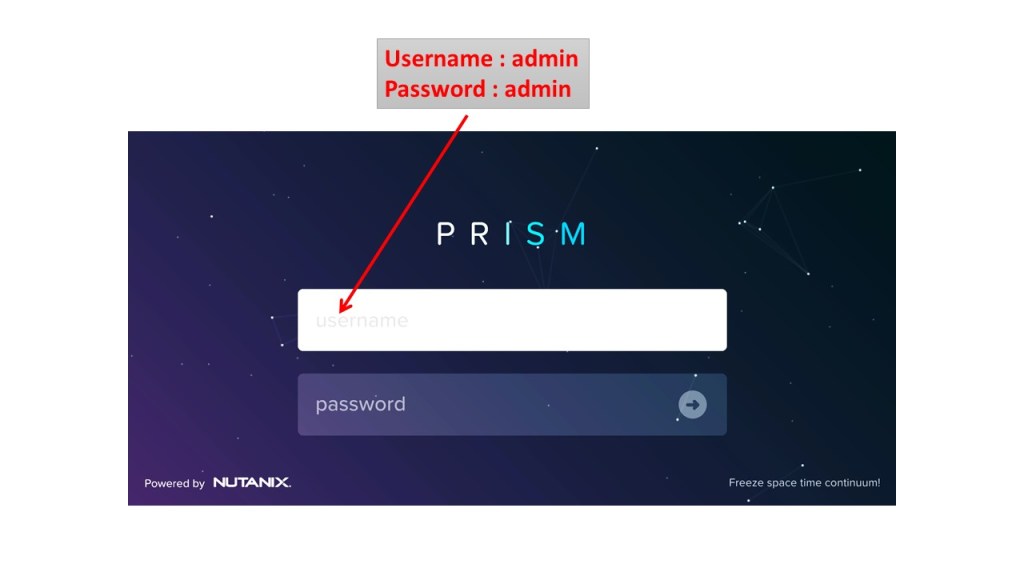
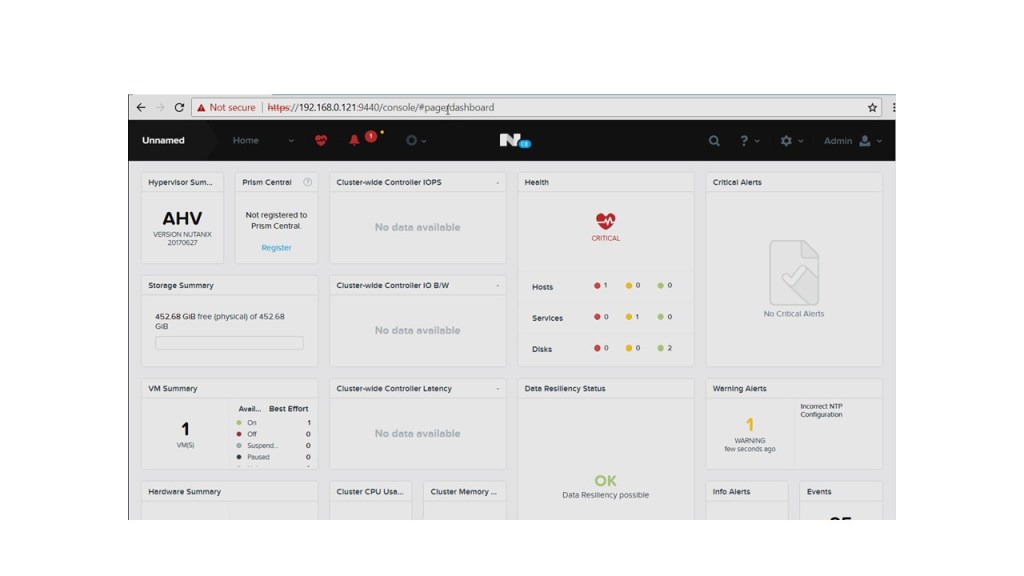
Installation Step-10 (Login to Prism Web Console First Time):-
You can use any HTML5 browsers like Firefox, Microsoft Edge & Google Chrome etc.. Not required any flash softwares etc). My recommendation Bonjour Print Service Install on your Prism browsing system. (https://support.apple.com/kb/DL999?viewlocale=en_US&locale=en_US)
Installation Step-10 (Login to Prism Web Console First Time) Contd…
Installation Step-10 (First Time login) Contd..
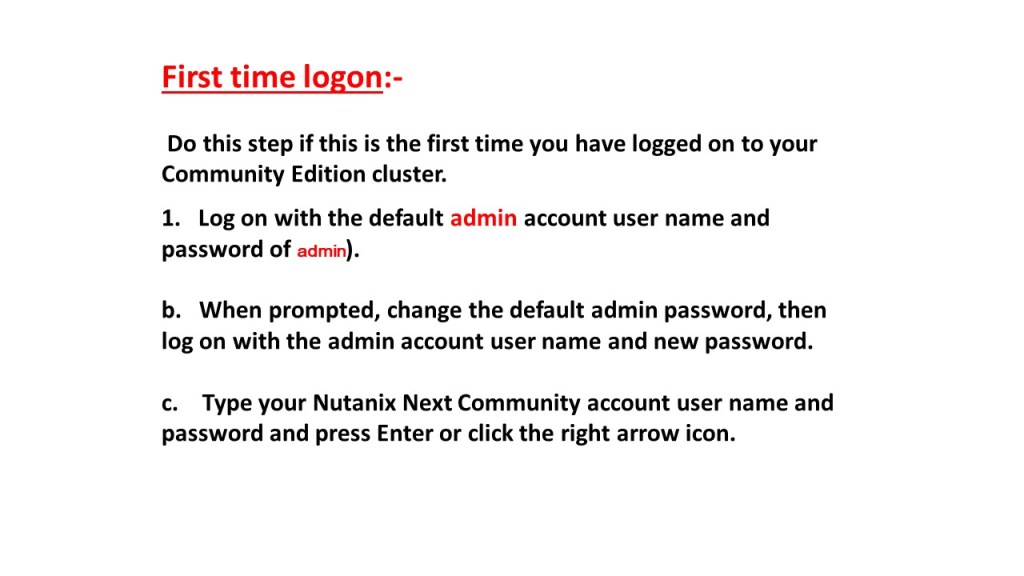
Installation Step-10 (First Time login) Contd..
Installation Step-10 (Change Password Section) Contd…

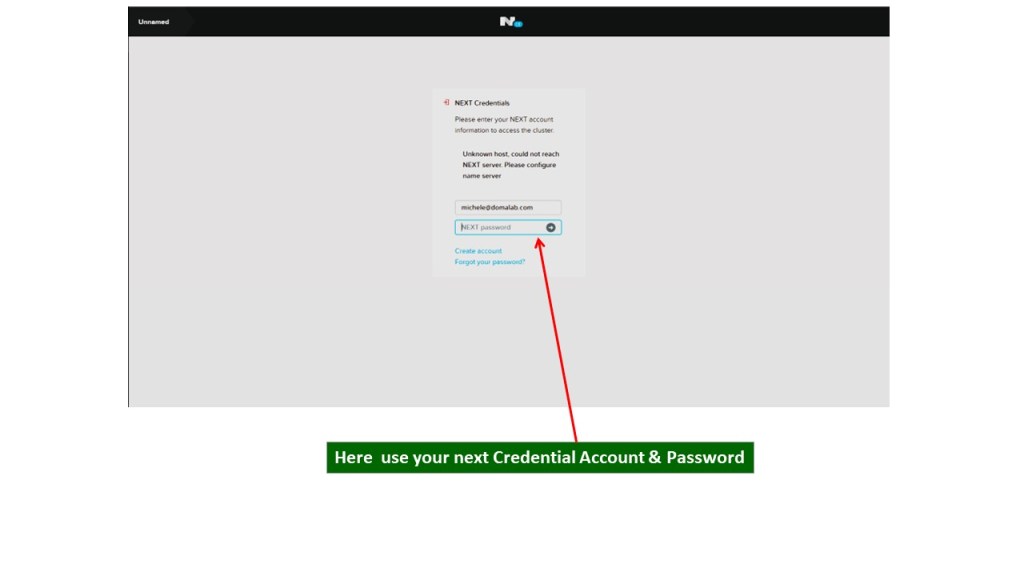
Installation Step-10 (Next Account Credential Section) Contd..
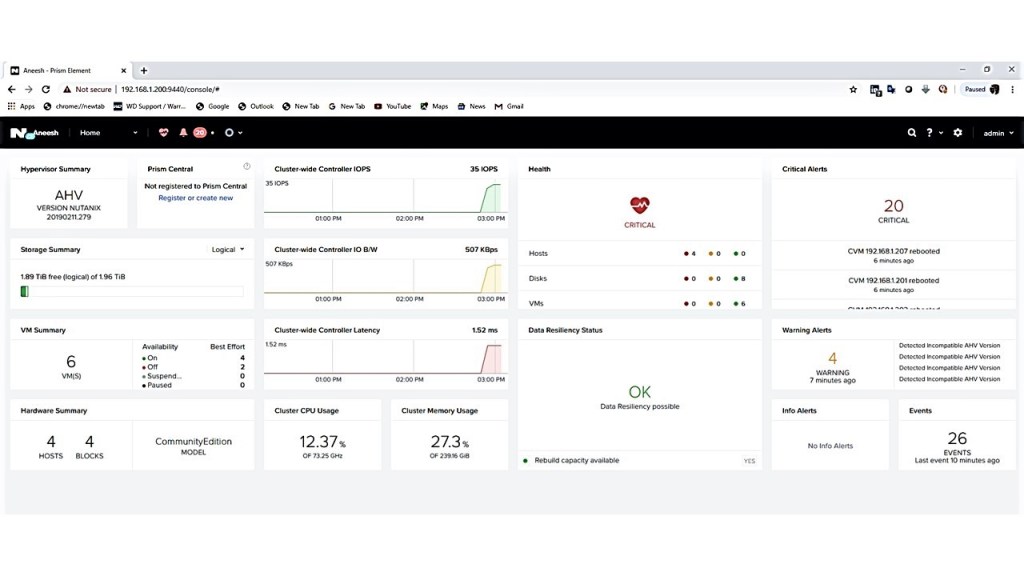
Prism Element API (Single Node) :-
Prism Element API (Cluster):-
More Related CE Official Videos & Docs:-
